
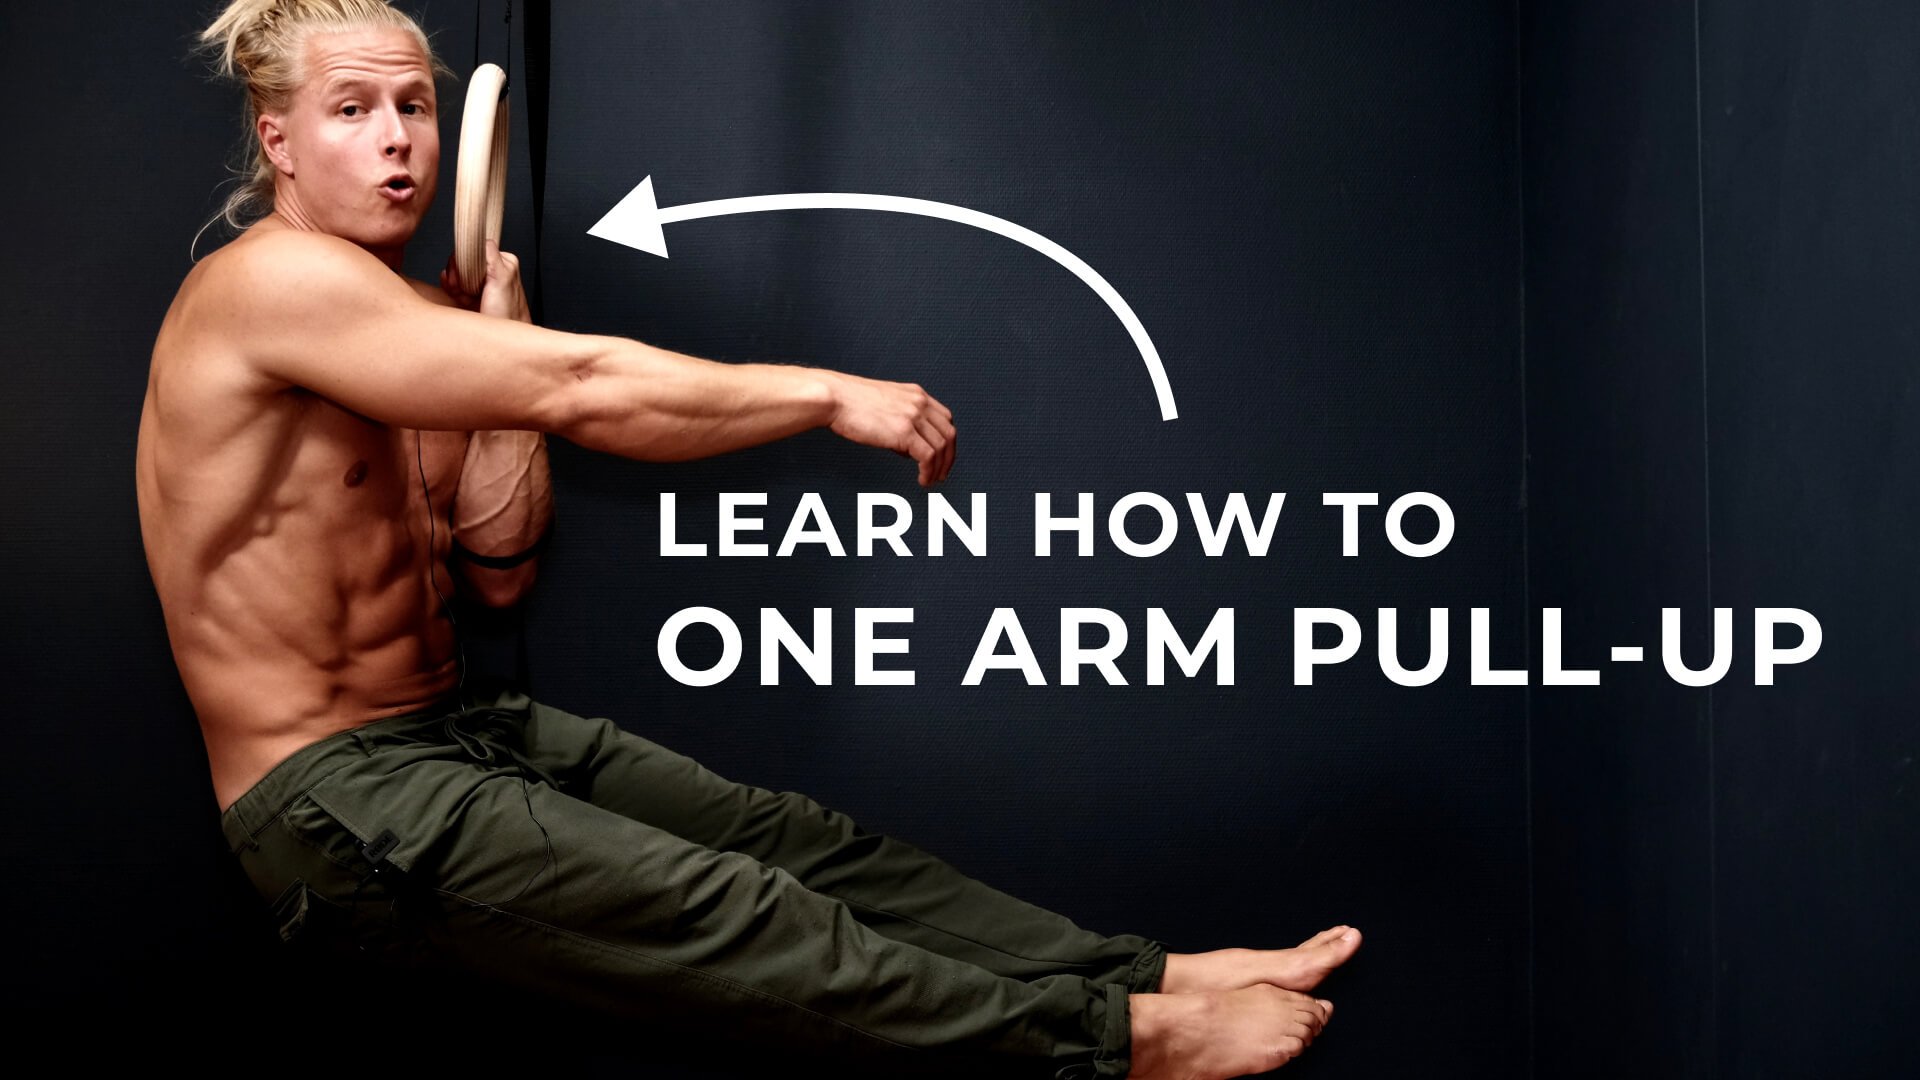
How to do One Arm Pull-Up - The King of Calisthenics pull strength
The one arm pull-up is perhaps one of the coolest and best ways of building upper back and biceps strength through bodyweight training. You could even call the one arm pull-up “the holy grail of bodyweight pulling strength” - But it is also “the king of elbow injury”.
I’ve been through every struggle imaginable when it comes to the One Arm Pull-Up. I’ve trained for it; achieved it; injured myself; re-trained and re-achieved it; injured myself in some other way; and scraped back to being able to do it again. Achieving consistent results with the one arm pull-up has been elusive for me, until the past year. I’ve taken the long and painful road to the OAPU. But I hope, through my experience with the One Arm Pull Up, I can guide you to following a less bumpy path to achieving it. So, in this guide to achieving the One Arm Pull-Up, I’ll be going over tips for injury prevention, different methods for training the OAPU, the stepwise progressions I recommend you follow, and exercises for building relevant strength for the OAP.
Injury Prevention for the One arm pull-up/chin-up
The One Arm Pull-Up is a skill that some people tend to get relatively easily, while others - myself included - might take years to achieve it. More important than how quickly you achieve it though, is trying not to injure yourself along the way. Therefore, first I’m going to go over injury prevention for the One Arm Pull Up.
The One Arm Pull Up puts a ton of pressure on your elbows, and this is something you need to be aware of. Golfer’s elbow, AKA Medial Epicondylitis, and Tennis Elbow, AKA Lateral Epicondylitis, are common injuries that will come up if you are not careful in your training.
So how to avoid these injuries when training for the one arm pull-up-chin-up?
One Arm Pull-Up Grip
You can train a bunch of different grips when training the one arm pull-up - you can use a pronated grip, a supinated group, or a neutral grip.
A trick for remembering supinated vs. pronated is: supinated is like holding a bowl of soup. Assuming you prefer to eat your soup out of the bowl and not off the floor, your palm will be facing you when you hold a bowl of soup - therefore, it will be in the supinated position. As for pronated, it is the opposite of supinated ;).
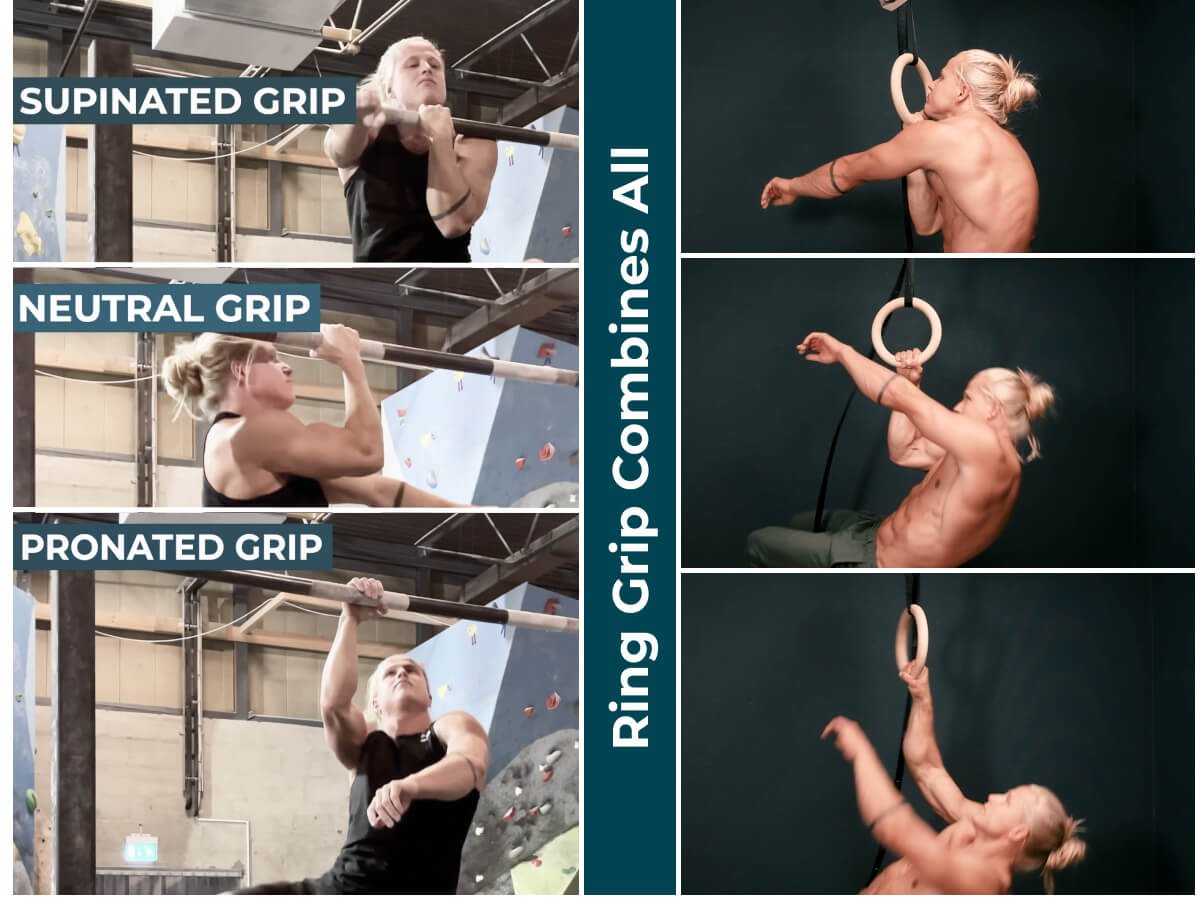
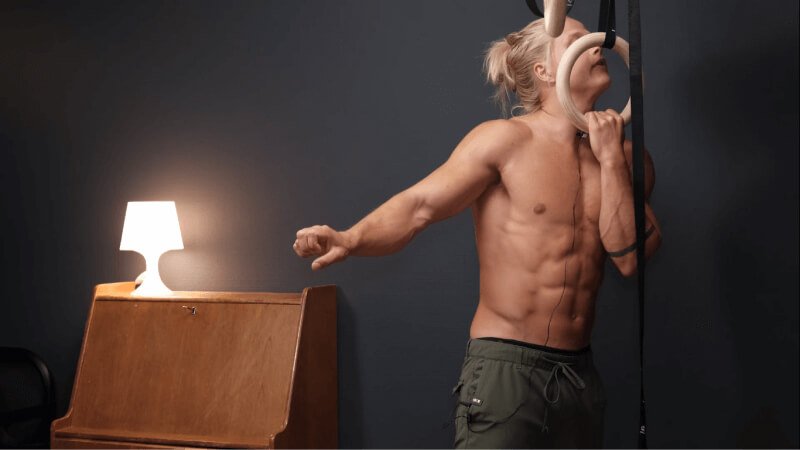
The grip you use for one arm pull-up training is important. The different grips put more tension on specific tendons in specific ranges. The one arm pull-up on gymnastic rings seems to be the best option as you can rotate hand along the range of motion to ensure the least tension through the whole range.
The grip that I recommend using for the one arm pull-up/chin-up and that in my experience is the least stressful is a combination of all three grip variations - pronated, supinated, and neutral - using gymnastics rings.

the one arm pull-up can be done using various grips. My advice is to use all of them to distribute the tension you are putting on your elbow rather than focus it in one area and risk injury. Check out the clip to learn more.
Using the gymnastics rings, you will start in a pronated position, and as you go up, you twist into a supinated group. This will ensure that you have as little tension on the tendons attaching to the elbow as possible.
If you do not have access to gymnastics rings, I highly recommend you switch up the grips you use in your training. Within each session you can alternate between the grips you use, or you can do one session using supinated grip, the next session pronated, and the next session a neutral grip.

Programs Designed Specifically for the One Arm Pull Up
In my app I have designed structured programs with specific workouts for you to train and achieve the One Arm Pull Up. If you’re serious about achieving this awesome movement, it could serve you to check it out. It’s free for the first month :)
Let go of your ego - train higher rep ranges
My second tip for injury prevention with the One Arm Pull Up is to train higher rep ranges with more assistance. Specifically, I recommend training progressions where you can perform 5-10 repetitions.
It’s natural, when we get strong enough to almost do a one arm pull up, or we get strong enough to do a negative one arm pull up, to do that. We want to show off our hard work and we also want to show to ourselves what we’re capable of. I recommend holding off on doing this until you are at a later stage, and I think this will be helpful in avoiding injury.

Two things to keep in mind for preventing injury
Do NOT do negative one arm pull-ups
Particularly, I would advise against training the negative one arm pull up or chin up. From my own personal experience, as well as with students and people I’ve talked with, the negative OAP is often responsible for injury or for starting us down the path of an injury.
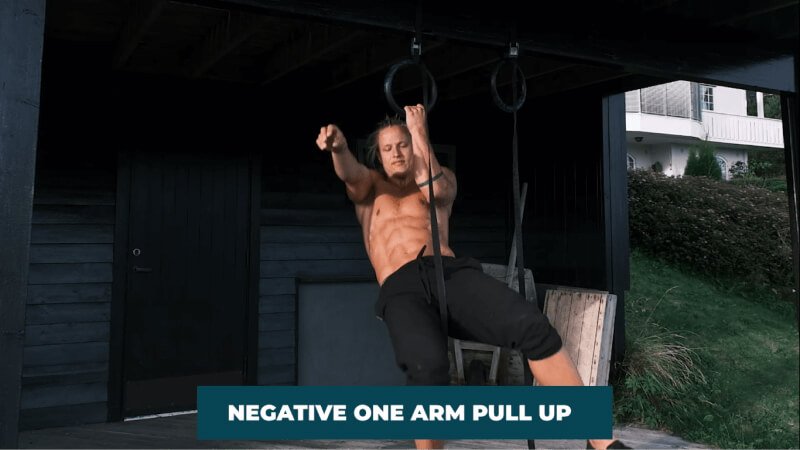
At the beginning, DON’T DO THESE! I advise against training these until you are able to perform a single One Arm Pull Up repetition. The negative one arm pull-up, or chin-up is very often related to an injury.
Progressing from Pull Ups to One Arm Pull Up
There are many ways of transitioning from a pull up to a OAP. Some people use resistance bands; some use some form of grip assistance, where the assisting hand is grabbing something on the side; and some people may even create some form of a pulley system.
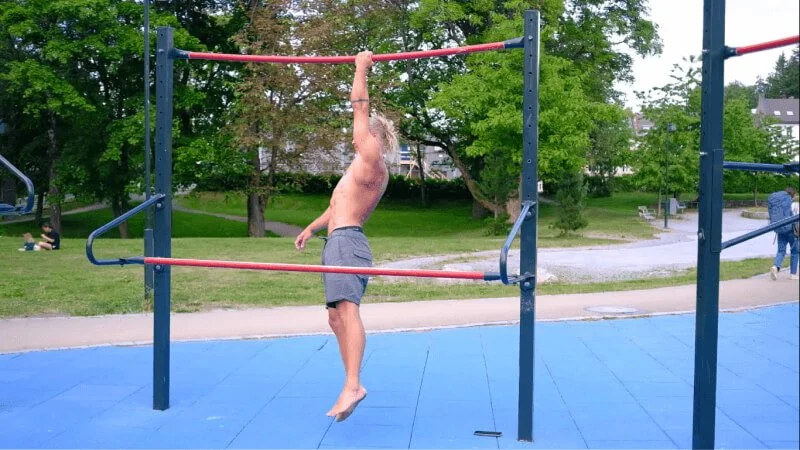
Of all the methods there are for transitioning from the pull up to the One Arm Pull Up, though, I recommend using a Finger Assisted Grip. With the Finger Assisted Grip, you will start with a full hand, and as you get stronger you will progressively use less and less assistance by dropping fingers. First you will stop using your thumb and use four fingers; then you will drop the pinky; then the ring finger; then middle finger, and you will have arrived at the One Finger Assisted Pull Up.
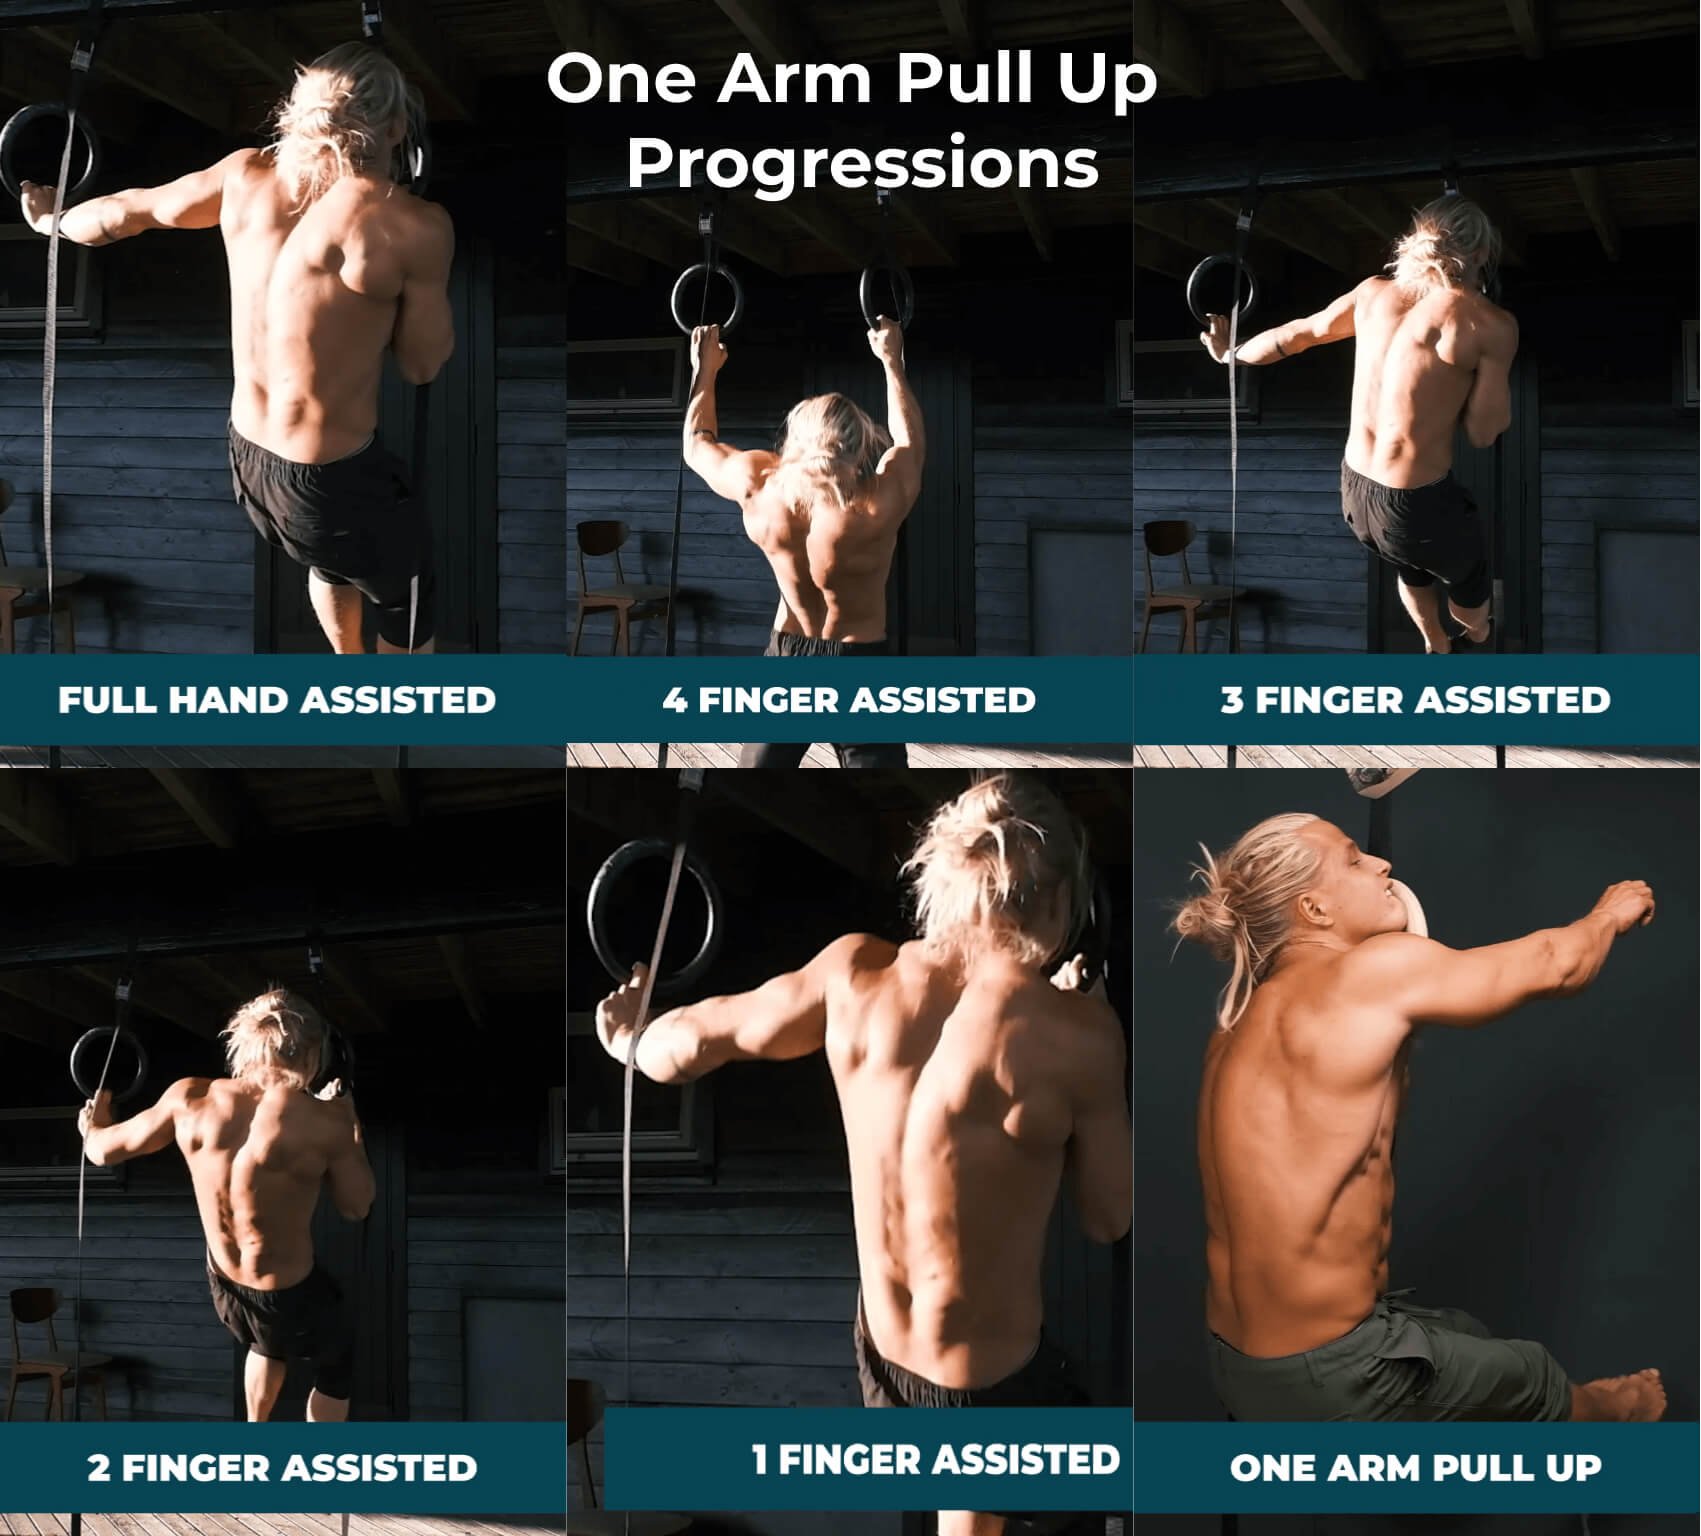
Main recommended progressions for the one arm pull-up
When you can do 5-10 repetitions of the one finger assisted pull up, I believe you’ll be able to do an unassisted One Arm Pull Up. Remember, once you do have the strength to do a one arm pull up, not to train it all the time. This is putting maximum tension on your elbow and so should be trained minimally. Continue using the one finger assisted pull up.
One thing to always make sure of, is to always lift your chin over your pulling arm. For example, if you are pulling with your right hand and assisting with your left, make sure you get your chin over your right hand.
be sure to get your chin over your pulling hand
Helpful exercises for the One Arm Pull Up
To develop grip strength, rotator cuff strength, and scapular strength, I also recommend you use One Arm Hangs in your training. These can be done stepwise like the one arm pull up, using your fingers to assist you and gradually using less and less fingers.
Scapular retractions are a helpful exercise for developing scapular strength, which will help with your OAP. With Scapular Retractions, your arm will be fully extended but you will be pulling yourself up and down using the upper back muscles. Your arm should stay full extended/not bend at any point for this exercise.
To develop a healthy shoulder I recommend you do One Arm Rotation Hangs. Hanging from one arm, you will rotate yourself from side to side, keeping the movement as controlled as possible.
One arm rotation hangs to develop scapular strength and grip strength for the one arm pull-up/chin-up
Let’s go over the important points that we’ve covered for the One Arm Pull Up.
How to do a One Arm Pull Up:
Most importantly, prevent injury: Prevent injury by alternating from supinated, pronated, and a neutral grip to reduce the load on your elbows. Even better - train with gymnastics rings. Secondly, don’t always work at the maximum of what you can do - train higher reps, i.e. 5-10 reps, using an assisted One Arm Pull Up variation.
Avoid Doing Negative One Arm Pull Ups: Avoid doing the negative one arm pull up as it puts you at risk of elbow injury.
Use Finger Assisted One Arm Pull Up to progressively reduce the amount of assistance you get from your assisting hand. Start with Full Hand assisted and drop one finger at a time. When you can achieve 5-10 repetitions at a given amount of assistance, drop another finger.
Keep technique in mind for all progressions - Always pull chin directly above the main pulling arm, and as you pull up, also twist elbow in towards body
When you are able to do 5-10 One Finger Assisted one arm Pull Ups, you will likely be able to achieve a single One Arm Pull Up repetition.
That’s about it for the one arm pull up. As always, though, if you want a more structured, step by step guide for how to achieve the One Arm Pull Up, you can take a look at my app. In it, I’ve created a full module specifically for training the One Arm Pull Up. There’s a free trial period so you can check it out before paying anything. Let me know what you think :)